Add an image on top of a step
Put a logo, diagram, or other picture from your device on top of a step, then move it, resize it, change which items it sits above, or remove it.
What an image looks like
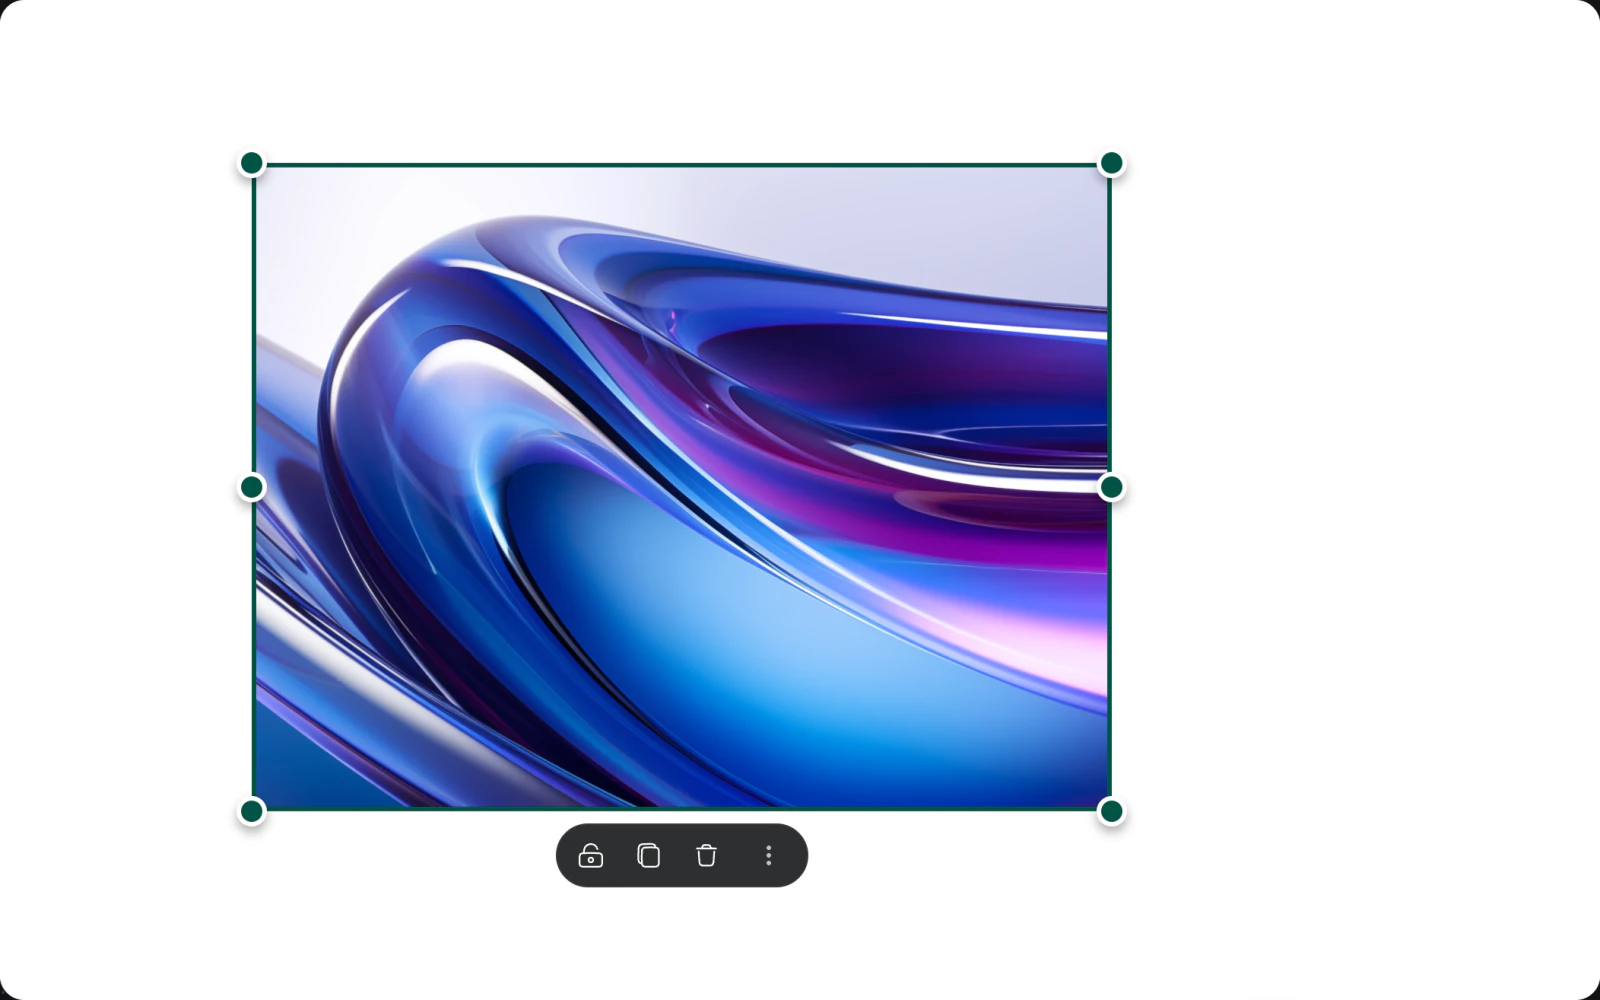
An image sits on top of the step, where you place it. Viewers see it as part of the step, over the screenshot.
Add an image
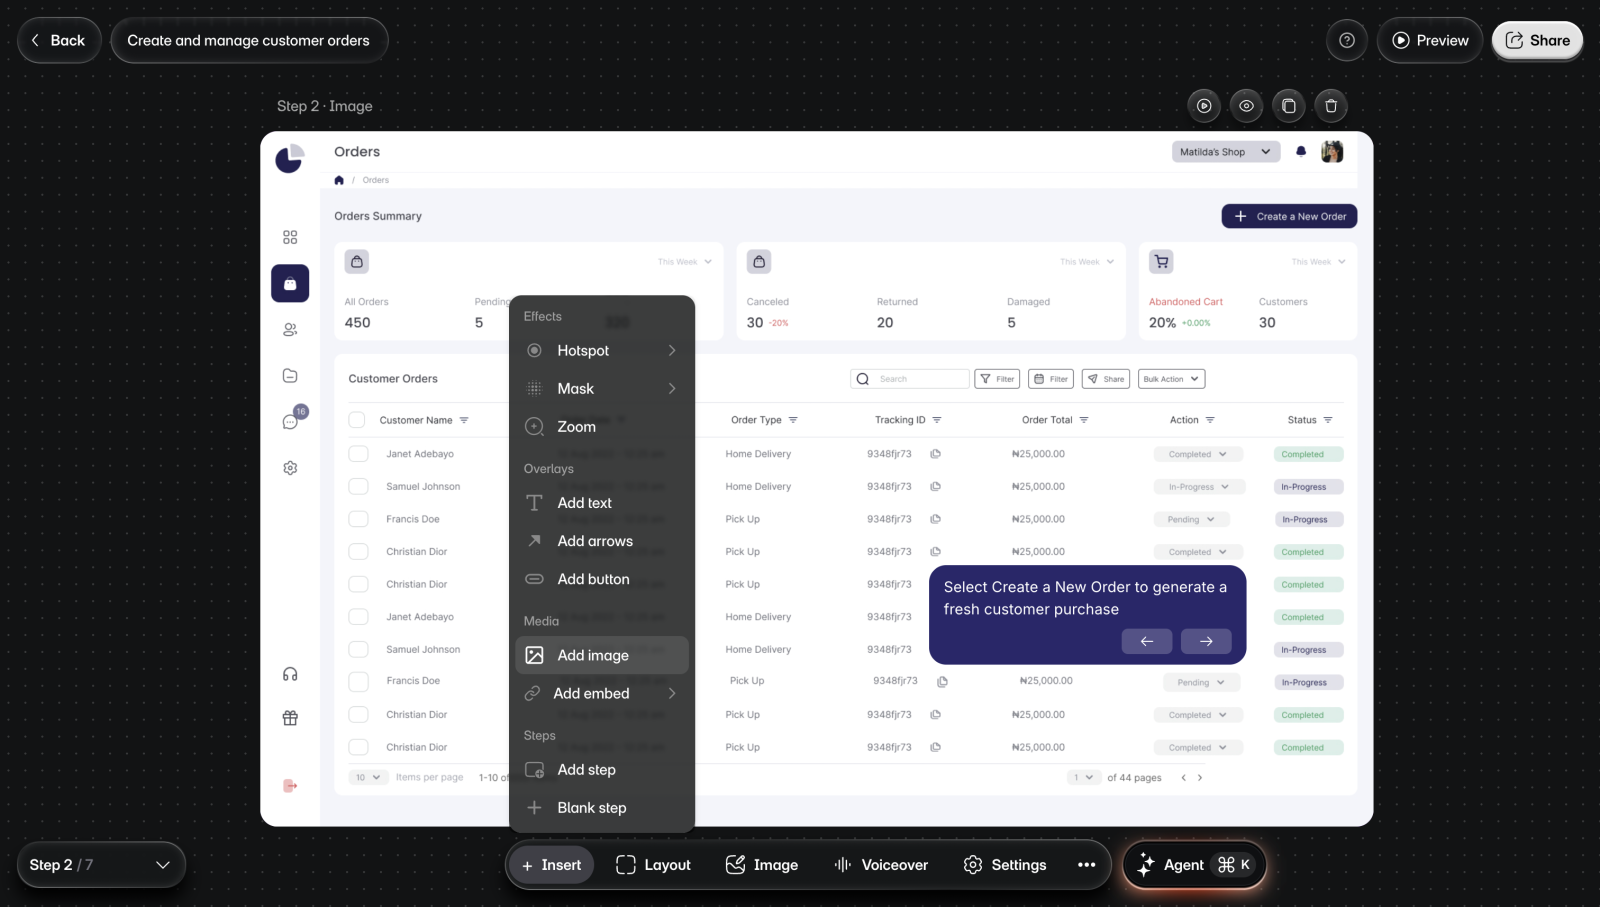
To add an image:
- Go to the step.
- Select Insert > Add image. You'll see your device's file picker.
- Choose an image file. You'll see it on the step, sized to fit within 40% of the step's width and half its height.
- Drag the image where you want it.
Add image puts a new picture on top of the step. On a step made from uploaded screenshots, Image in the bottom bar is a different control: it sets how the screenshot itself fills the step. See Layouts and backgrounds.
Resize, arrange, or remove an image
Select the image to see its handles and its toolbar.
- Drag a corner to resize it and keep its shape. Drag a side handle to stretch it sideways.
- Drag the image to move it. The arrow keys move it 1 px at a time, or 10 px with Shift.
- Lock keeps it from moving or resizing. Select the lock again to release it.
- Duplicate adds a copy, and Delete removes the image.
- The three dots hold Bring to front, Bring forward, Send backward, and Send to back, to change which items the image sits above.
Limits
- Insert isn't on the intro or outro, and on a step made from a screen recording it offers only new steps. Images can't go on those steps.
- You can't crop, replace, or link an image once it's on the step. To change it, delete it and add the new one. To send viewers somewhere, add a button.
- In a layout other than Full screen, items on the step can't be moved or resized. Switch the step back to Full screen to change them.